author: @malik tags:#apache#linux
Case server ubuntu
-
masuk ke ip server lewat ssh
-
masuk folder /var/www/html
-
buat folder nama_folder
-
sudo chmod 755 -R ./nama_folder
Cara intial cloudflare
-
beli domain untuk digunakan di cloudflare
-
di cloudflare daftar dan verifikasi akun
-
di menu website pilih add site
-
input nama domain yang sudah dibeli lalu klik add site
-
pilih free plan lalu continue
-
step 2 pilih continue dulu
-
apabila ada popup add records later pilih confirm
-
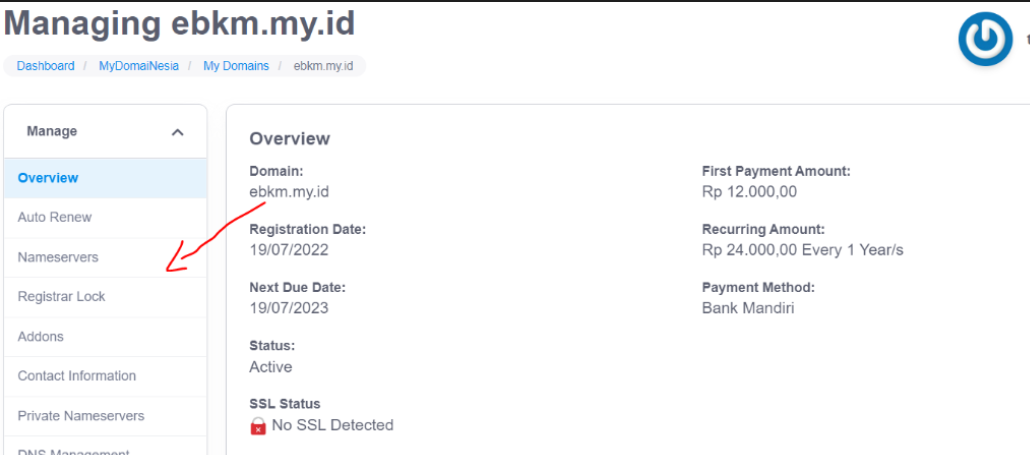
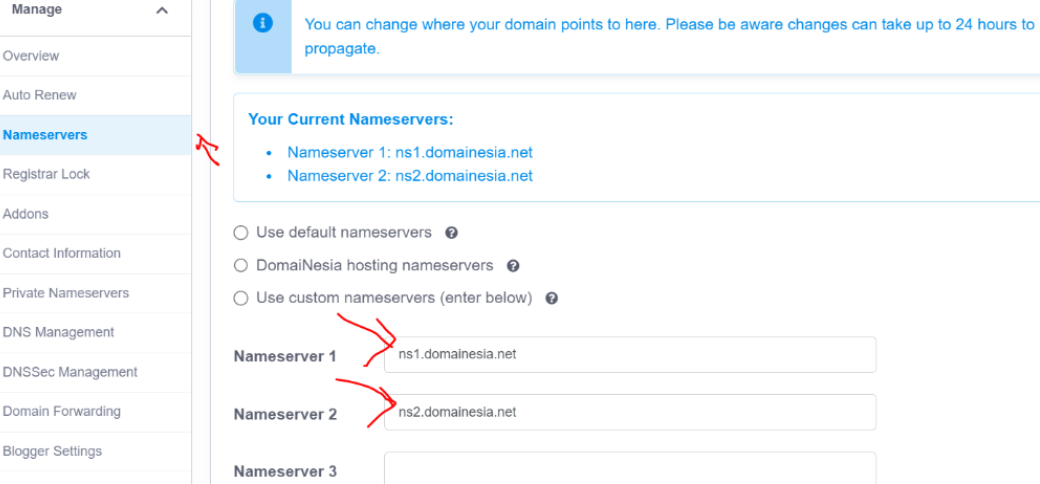
step 3 copy nameserver cloud flare lalu ubah nameserver yang ada pada dns yang sudah dibeli.
-
pilih domain yang sudah dibeli lalu arahkan ke Nameservers
-
ganti nameserver default yang ada pada dns yang dibeli menjadi nameserver yang disediakan cloudflare
-
lalu klik done checknameserver
-
setelah nameserver sudah di confirm oleh cloudflare selanjutkan tinggal pilih fitur” tambahan yang diperlukan saja dan continue hingga website cloudflare berhasil dibuat.
Cara mengarahkan cloudflare ke ip server yang sudah dibuat
-
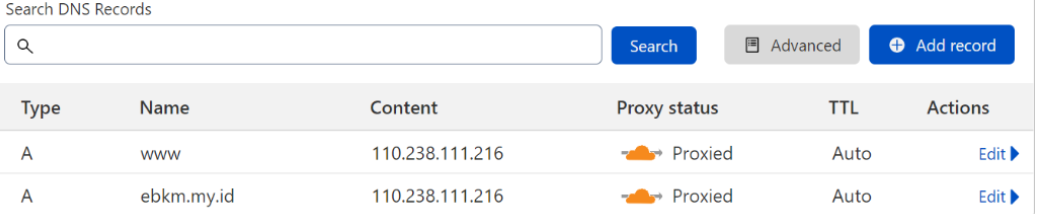
pilih DNS
-
tambahkan records
-
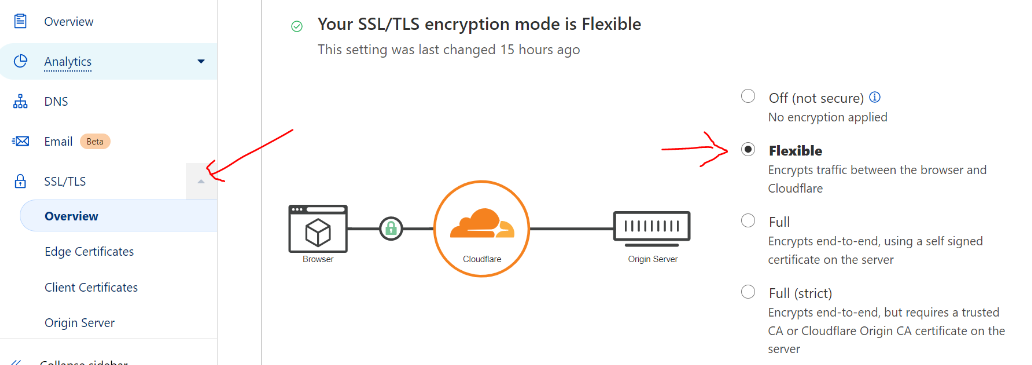
ubah SSL di cloudflare menjadi flexible (note jika terdapat error ubah settingan SSL)
 Buat Virtual host sesuai dengan server case UBUNTU 20.04
Step 4 — Create New Virtual Host Files
Apache comes with a default virtual host file called 000-default.conf that we’ll use as a template. We’ll copy it over to create a virtual host file for each of our domains.
Create the First Virtual Host File
Start by copying the file for the first domain:
sudo cp /etc/apache2/sites-available/000-default.conf /etc/apache2/sites-available/example.com.conf
Copy
Open the new file in your editor (we’re using nano below) with root privileges:
sudo nano /etc/apache2/sites-available/example.com.conf
Copy
We will customize this file for our own domain. Modify the highlighted text below for your own circumstances.
/etc/apache2/sites-available/example.com.conf
<VirtualHost *:80>
    ServerAdmin admin@example.com
    ServerName example.com
    ServerAlias www.example.com
    DocumentRoot /var/www/example.com/public_html
    ErrorLog ${APACHE_LOG_DIR}/error.log
    CustomLog ${APACHE_LOG_DIR}/access.log combined
</VirtualHost>
At this point, save and close the file.
Copy First Virtual Host and Customize for Second Domain
Save and close the file when you are finished.
Step 5 — Enable the New Virtual Host Files
With our virtual host files created, we must enable them. We’ll be using the a2ensite tool to achieve this goal.
sudo a2ensite example.com.conf
sudo a2ensite test.com.conf
Copy
Next, disable the default site defined in 000-default.conf:
sudo a2dissite 000-default.conf
Copy
When you are finished, you need to restart Apache to make these changes take effect and use systemctl status to verify the success of the restart.
sudo systemctl restart apache2
Copy
Your server should now be set up to serve two websites.
cara membuat conf apache virtual host
cd /etc/apache2/sites-availale
sudo vi <nama domain>.conf
<VirtualHost *:80>

    ServerAdmin admin@example.com

    ServerName ebkm.hitdigital.id

    DocumentRoot /var/www/html/ebkm

    ErrorLog ${APACHE_LOG_DIR}/error.log

    CustomLog ${APACHE_LOG_DIR}/access.log combined

</VirtualHost>
Note Command VI untuk keluar dan save:
type> etc
type> :wq
Note Command VI untuk Edit/Insert :
type> a
type> enter
-
sudo a2ensite example.com.conf
sudo service apache2 restart
Cara Membuat virtual host dengan node js serve
sudo a2enmod proxy
sudo a2enmod proxy_http
sudo a2enmod ssl
sudo a2enmod proxy
sudo a2enmod proxy_balancer
sudo a2enmod proxy_http
<VirtualHost *:80>

        ProxyPreserveHost On

        ProxyRequests Off

        AllowEncodedSlashes NoDecode


        ServerName hitfaceapi.my.id

        ServerAdmin webmaster@localhost

        #DocumentRoot /var/www/html/ebkm-api


        #<Directory /var/www/html/ebkm-api>

        #       AllowOverride All

        #</Directory>


        ErrorLog ${APACHE_LOG_DIR}/error.log

        CustomLog ${APACHE_LOG_DIR}/access.log combined


        ProxyPass / http://localhost:3000/

        ProxyPassReverse / https://localhost:3000/


</VirtualHost>